DOCUMENTATION
Bricks Admin Dashboard Getting Started Guide
Welcome to the "Bricks Admin Dashboard Getting Started Guide" This guide is designed to provide step-by-step instructions to harness the full potential of Bricks Admin Dashboard. This guide will show you how to to create to create stunning, user-friendly interfaces using Bricks Templates, and apply them to the Wordpress Admin Area Dashboard.
Here’s what this guide will cover.
- Overview
- Installation And Activation
- How to Make A Bricks Template For the WP Dashboard
- How to apply A Bricks Template to the WP Dashboard
overview
Your WordPress Admin Dashboard just got an upgrade! Bricks Admin Dashboard is a robust and user-friendly plugin designed to revolutionize your WordPress Admin Dashboard experience. It's extremly simple. It allows you to apply Bricks Templates as dashboards in the /wp-admin/ area based on user or user role.
After installing and activating the plugin, you can start by creating a template in bricks, and applying the WP Admin Dashboard template type. Then we can use the Bricks Admin Dashboard plugin settings page to apply the template(s) to the user(s) or user role(s) we want to. That's it! If you don't understand any part of that, we'll cover that all in detail here.
After installing and activating the plugin, you can start by creating a template in bricks, and applying the WP Admin Dashboard template type. Then we can use the Bricks Admin Dashboard plugin settings page to apply the template(s) to the user(s) or user role(s) we want to. That's it! If you don't understand any part of that, we'll cover that all in detail here.
Installation and Activation
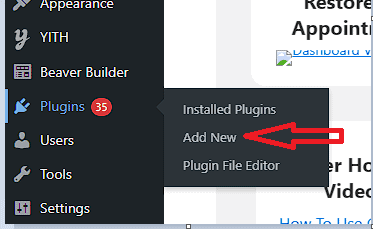
Step 1: Navigate to the Plugins Section:
Hover on the Plugins Menu on the left side of the screen and click on "Add New".
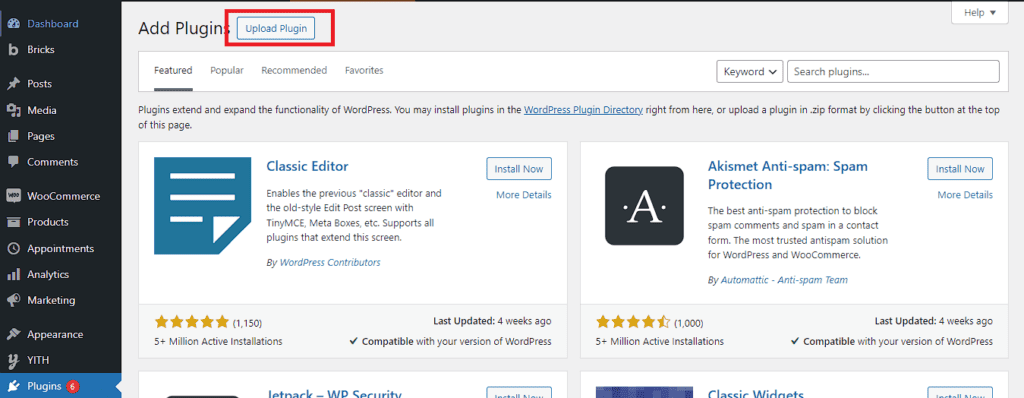
Step 2: Click on the "Upload Plugin" Button, then choose a file.
On the top of the plugins page, navigate to a button Upload Plugins and click it, then click "Choose File"
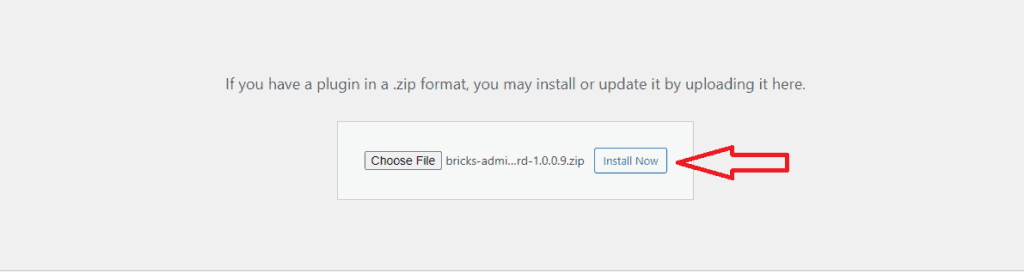
Step 3: Search for the Plugin on your local directory
When you click "Choose File" you will be able to choose the plugin file you want to install. This is where we select the bricks-admin-dashboard.zip file.
After you purchased the Bricks Admin Dashboard, you probably downloaded it. If you didn't you can do so here https://bricksadmindashboard.io/my-account/downloads/
After you purchased the Bricks Admin Dashboard, you probably downloaded it. If you didn't you can do so here https://bricksadmindashboard.io/my-account/downloads/

Step 4: Click on Install Now
After navigating the freshly downloaded zip file of the Bricks Admin Dashboard. Click on Install Now and it will be installed on your WordPress plugin list.
Activation
After installing the Bricks Admin Dashbord Plugin the next step is to Activate .
Step 1: Navigate the Bricks Admin Dashboard on the plugin lists.
Navigate the Bricks Admin Dashboard on the plugin lists and click on "Activate"

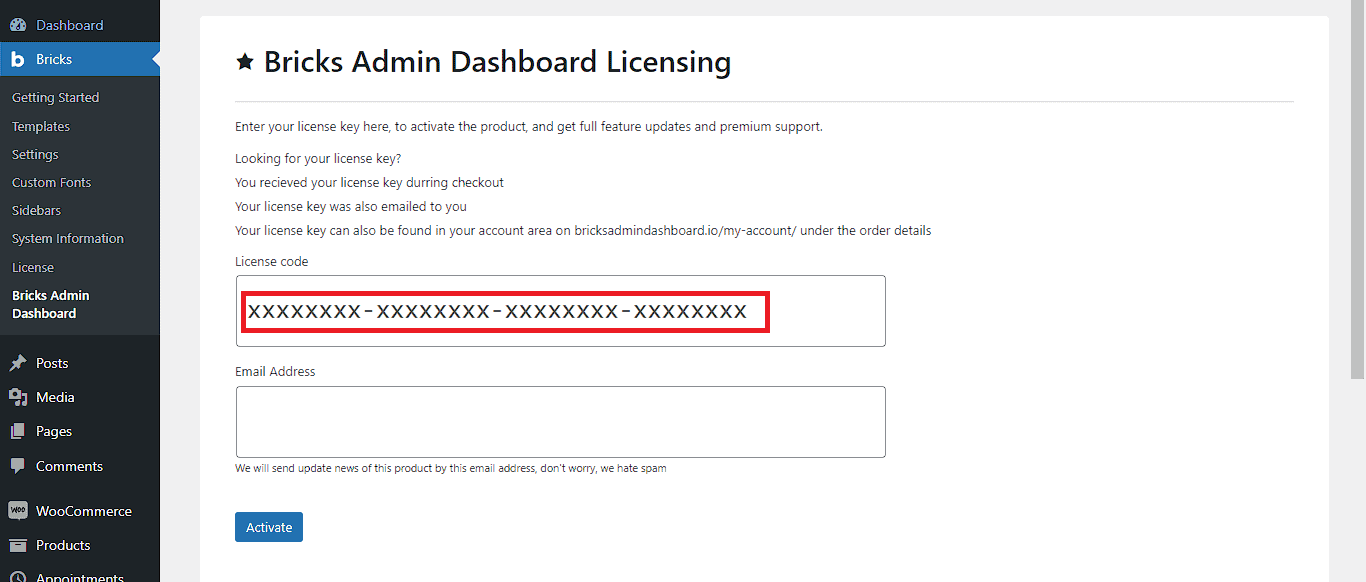
Step 2: Activate the Bricks Admin Dashboard using License key.
If you have a license key you can insert it here. Also insert the email address from your Bricks Admin Dashboard Account to receive updates.
Finally, click "Activate"
Finally, click "Activate"
And the Bricks Admin Dashboard is now installed and Activated on your WordPress site.
How to Make A Bricks Template For the WordPress Dashboard
Once the Bricks Admin Dashboard is installed and activated on your WordPress site, creating an admin dashboard with a bricks template is now possible The first step is to create a template for the dashboard, and give it th correct template type.
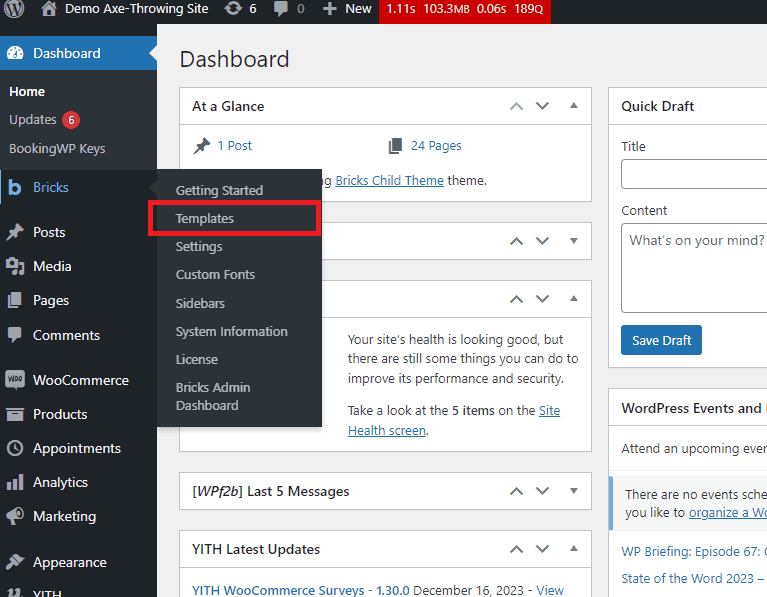
Step 1: Click Bricks then Templates.
The templates section in the Bricks Builder settings allows you to create Bricks templates. We will use one or more of these templates for our dashboard(s).
Step 2: Choose whether Add New or Import Template
You have the option to import a tempate, or create a new one.
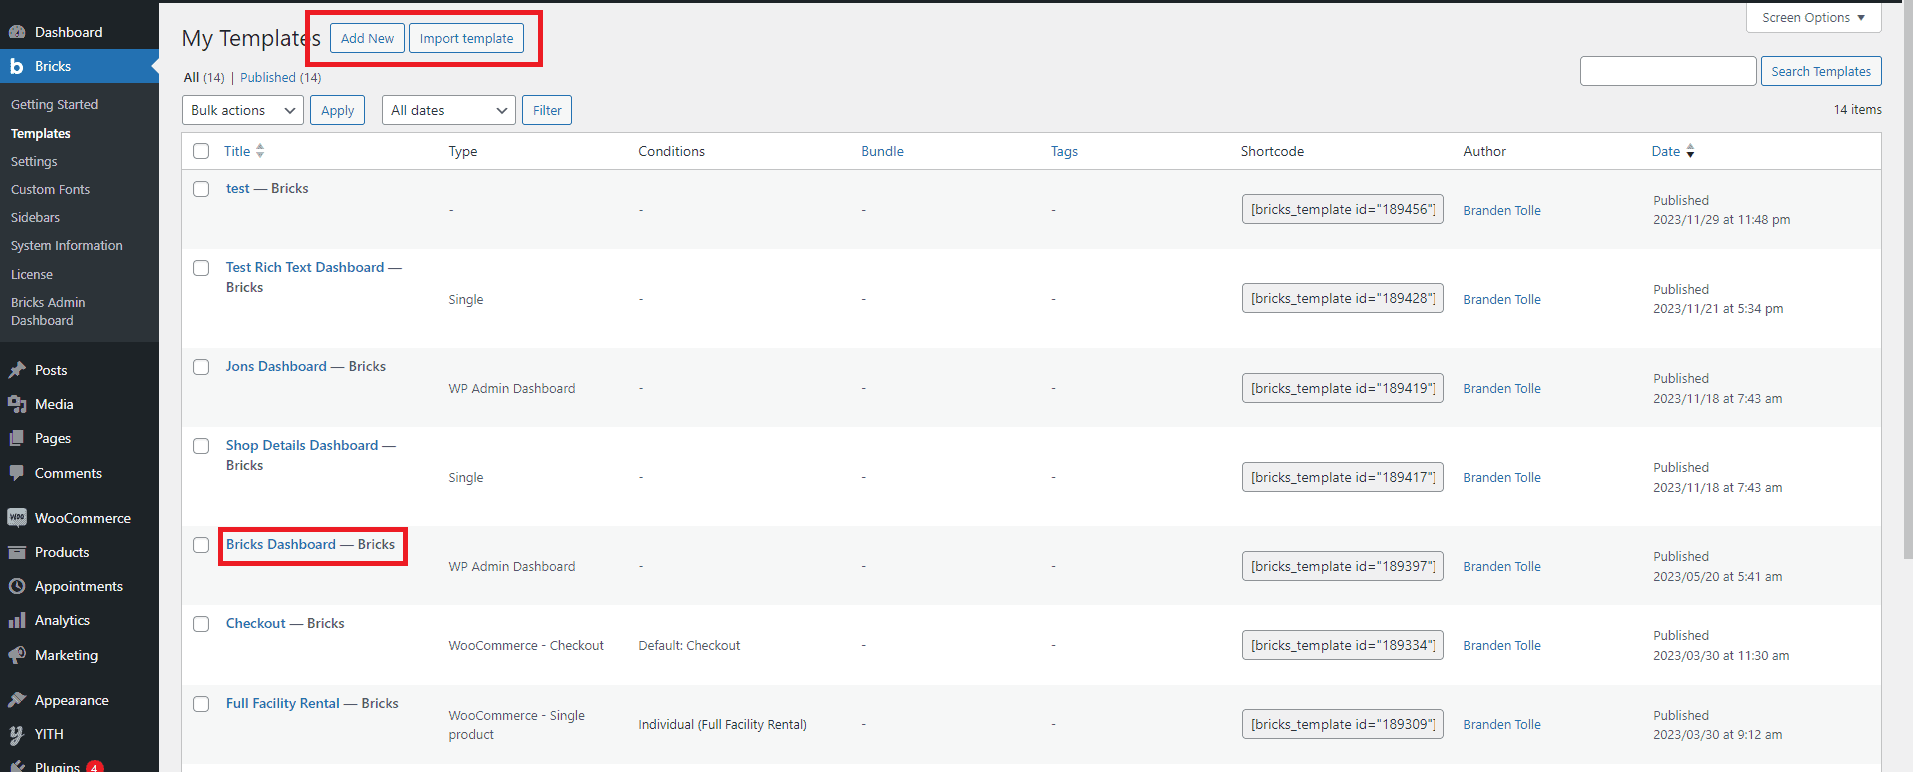
- Add New – If you want to design your own Admin Dashboard you can use this. After clicking this button you will be directed to Bricks Builder Editor to start building your template.
- Import Template – If you have already an Admin Dashboard template from other site or from other sources you can import it using the Import Template Button.
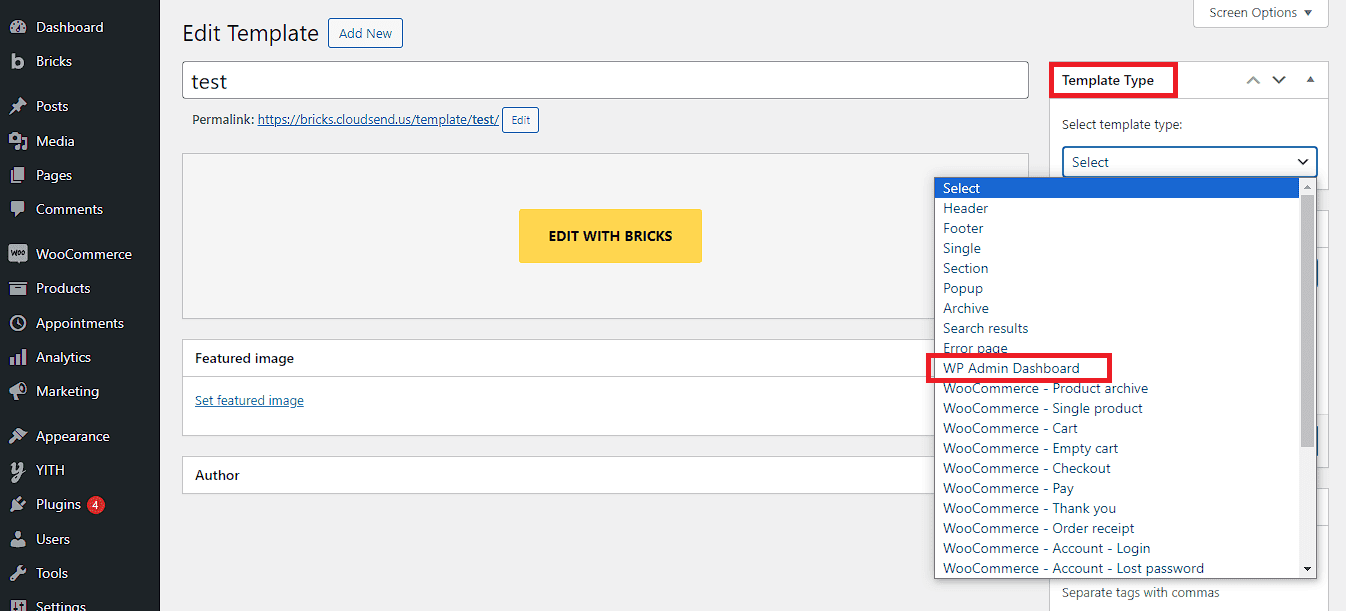
Step 3: Apply the template as WP Admin Dashboard
For templates to appear in the Bricks Admin Dashboard settings, we must assign the template as WP Admin Dashboard. This also allows you to conditionally apply theme styles to this template type if desired.
How to apply A Bricks Template to the WP Dashboard
Once the desired template has been created, we can apply it to the WordPress Dashboard. Doing so is simple, and starts in the Bricks Adin Dashboard Settings.
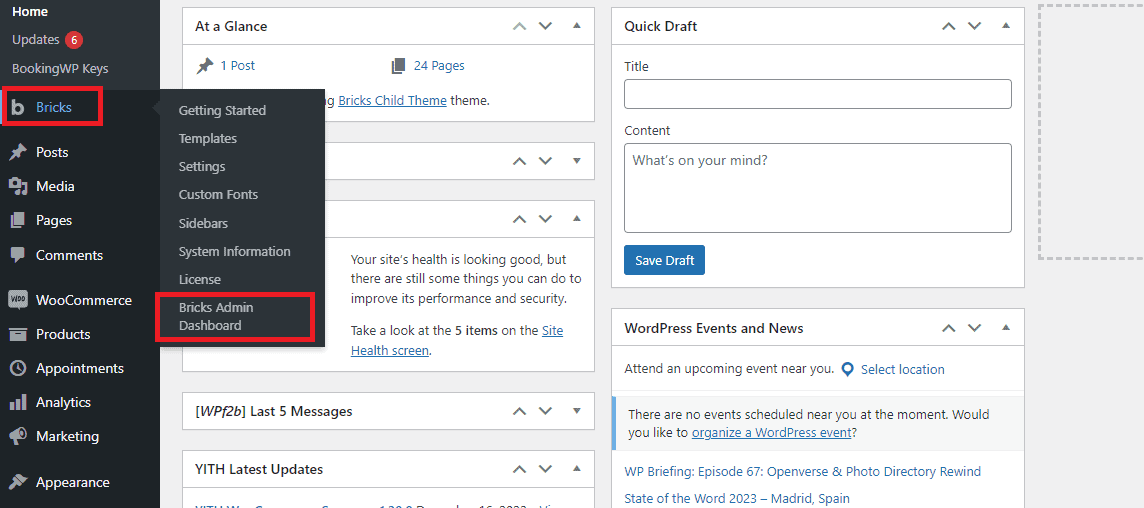
Step 1: Navigate to the Bricks Admin Dashboard Menu
Navigate to the Bricks Builder on the left side of the WordPress Panel, then hover and click on Bricks Admin Dashboard.
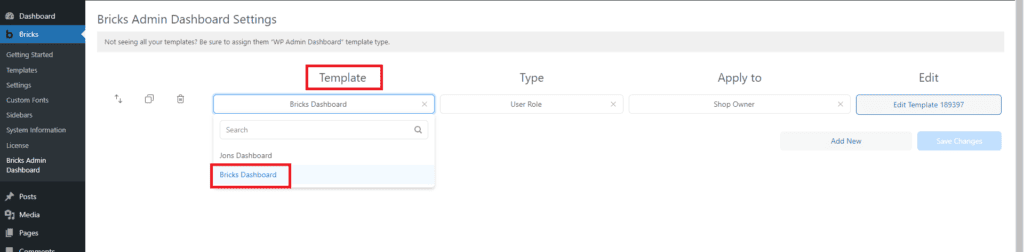
Step 2: Choose your Dashboard Template.
On the template Column you can select the Dashboard template you want to display.
Don't see your templates here? You probably didn't apply the template type from step 3 in the previous section.
Don't see your templates here? You probably didn't apply the template type from step 3 in the previous section.
On the template Column you can select the Dashboard template you want to display.
Step 3: Choose a type
This column represents the different ways you can apply the templates

- Apply Dashboard by User Roles – Using this option, you can apply the Admin Dashboard Template to specific user Roles that are registered on your WordPress site. It could be Administrators, Editors, Customers, Contributor etc.
- Apply Dashboard by User – Using this option, you can apply the Admin Dashboard Template to specific Users on the WordPress site, regardless of their role
Note: “user” type templates will be given priority over “User Role” templates. For example, you can apply Dashboard1 to all Administrators, but you can apply Dashboard2 to user Joe, who is an Administrator. Dashboard 2 will be displayed for Joe.
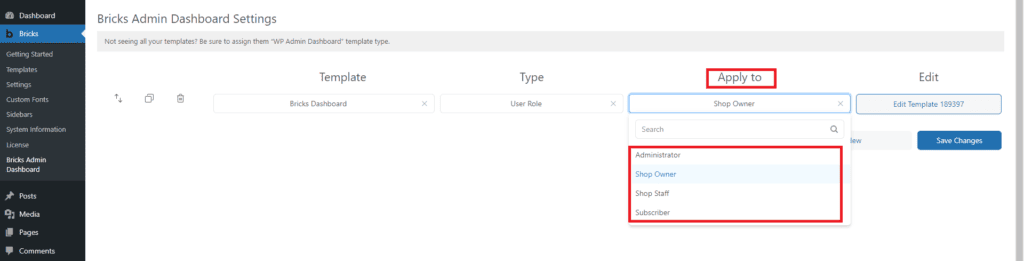
Step 4: Choose where to apply the dashboard.
This settign will allow you choose the user or user role you desire to apply the tempalte to.
Step 5: Click Save Changes
Clicking on the "Save Changes" button will apply the settings, and the dashboards will become visible for their respective users or user roles.
